Components and options
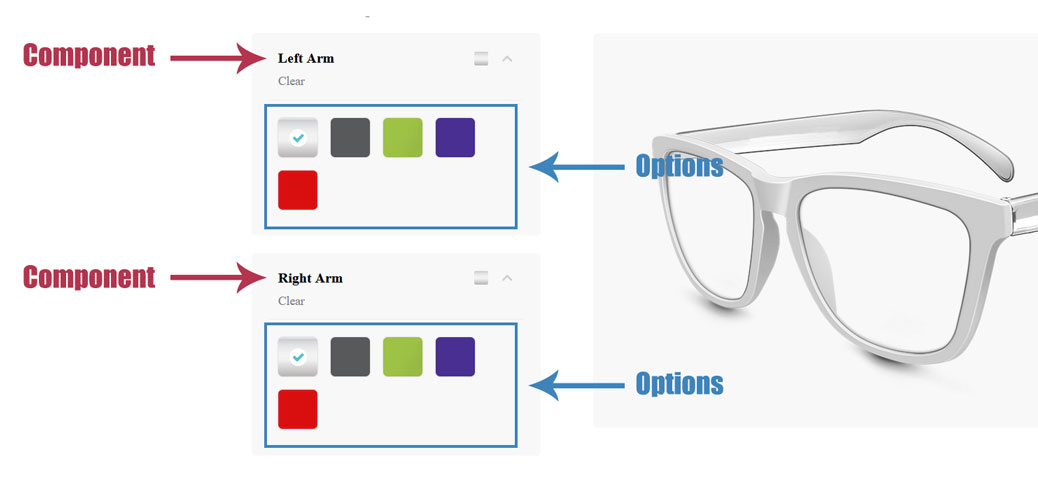
This article will show you how to create and manage Components and options. The components are the configurable parts of your product while the options are all the variations of these parts.
/!\ Associated posts /!\
- Layering system
- Configuration basic settings
- Configuration design tips
- Configuration media optimization
1. Components settings
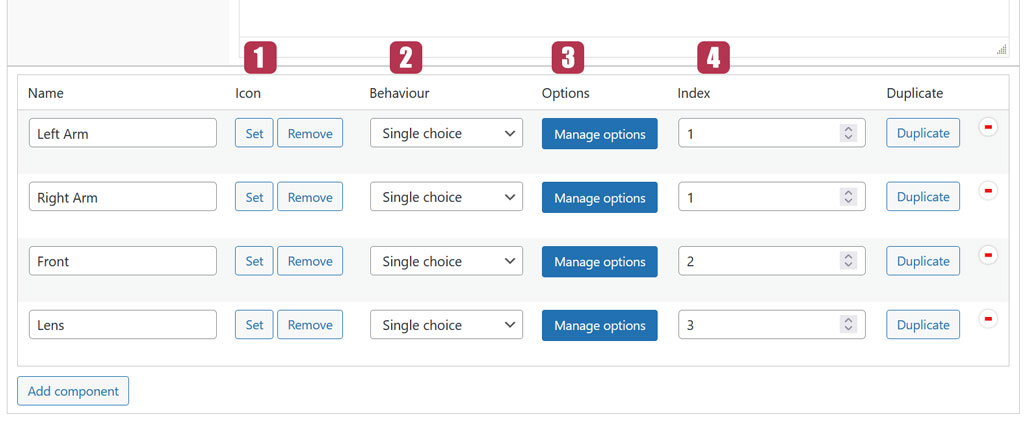
1.1. Icon
The icon is an image representing the component.
1.2. Behavior
There are 3 options available here: Single choice, Multiple choices and Dropdown.
- Single choice: Allows only one selection among the component options
- Multiple choices: Allows multiple selections among the component options
- Dropdown: Make the option appear as a dropdown list and allows only one selection
1.3. Manage option button
This button will open the options settings window related to each component.
1.4. Index
The index feature is related to the Layering system. It’s a way to organize the components layers during the merging. A component with a higher index will have its layer placed on top of the others.
2. Options settings

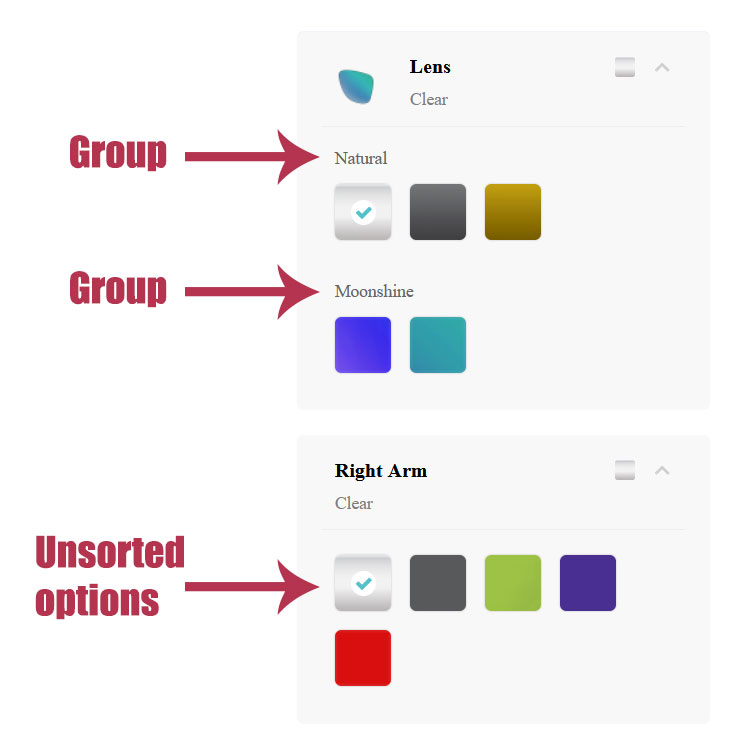
2.1. Groups
The Group feature is a way to organize the options according to some of their attributes or categories.
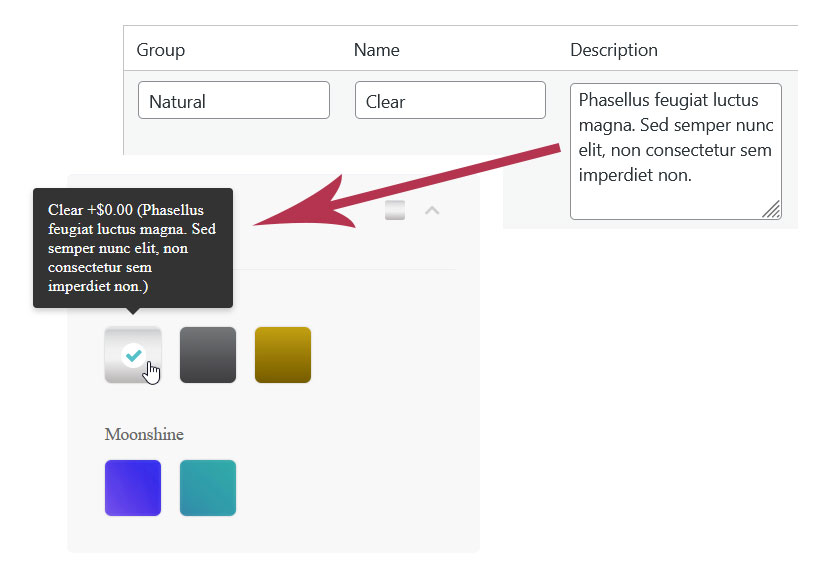
2.2. Description
The description field is designed to add descriptive text about an option.
2.3. Icon and image
This is where most of the configuration media are set. As mentioned above and in this article about the layering system, the options are variations of each configurable part of the product which are represented by the components. The icon is a button that allows you to select the option, which will trigger the addition of the option image to the configurator preview.
In order for the configurator to render the product correctly in the preview, we recommend that the images be PNGs. JPGs are supported but as this format does not handle transparency, it’s not a good choice.
If your website uses Content Delivery Network features, then make sure all media used for your configurations are located on the server where Visual Product Configurator is installed. Otherwise, bugs may arise.
2.4. Price
When you select an option on the configurator, its price is added to the base price of the product (Woocommerce regular price). If the option is deselected, its price is subtracted from the total price.
2.5. Default
If an option is marked as default, then it will be selected automatically when the configurator loads.
3. Data loss prevention
While building your configuration, you may experience a data loss issue when saving your modifications. This usually happens in heavy configurations. By this, we mean configurations with a lot of components and options.
To prevent this, please increase The “PHP post max size” and “PHP max input vars” values of your server. You can read the values on the Woocommerce status page
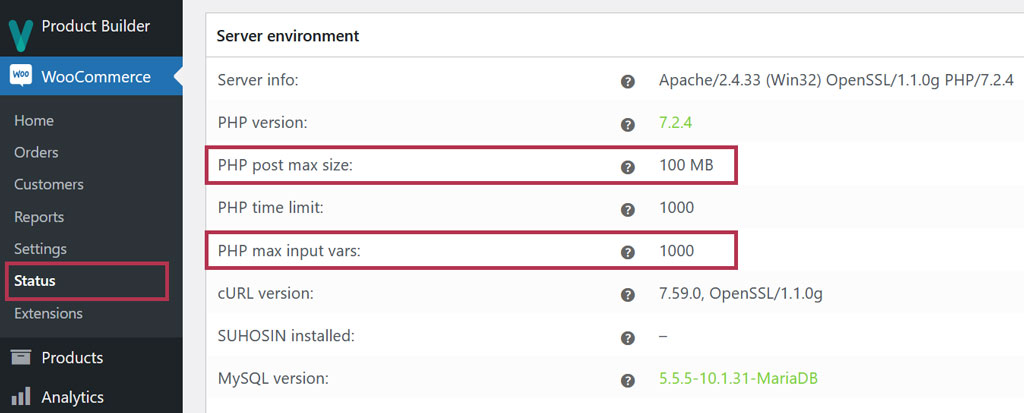
You cannot change those values from the Woocommerce status page. It needs to be done in the PHP.ini file of your server. If you are not familiar with this file, ask your webmaster or your host support to help you with that
If you have to change those values, then use values that are multiples of 2 of previous ones and do it only when you experience data loss in your configurations.
Last updated on May 15, 2023