Generate a print ready output
Nati, our Custom Lettering Designer understands the value of a print ready PDF file and lets you generate up to 48 inches outputs at 300dpi outputs with entirely customizable crop and bleed marks for PDF. Here is how to manage your outputs:
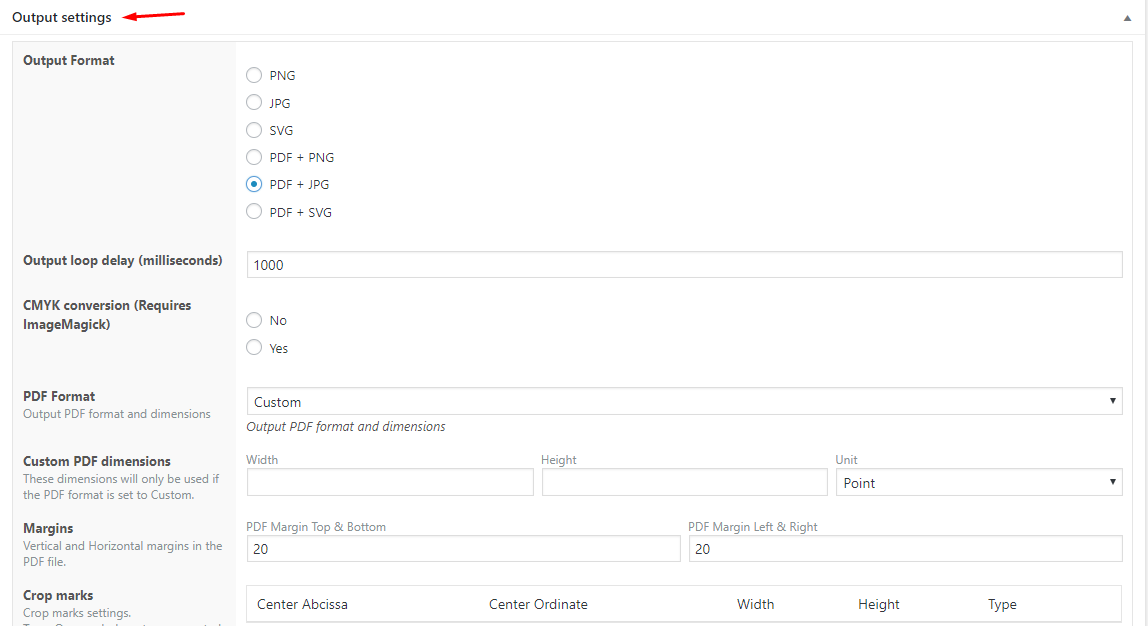
1. Print ready settings
The output settings is a set of options that allows you to get a print ready output that meets your demands.
To manage the output options, go to Dashboard > CLD > Configurations > Your_configuration_name.
Each outputs option is explained below, including how they may help you to get the best output file ever.
1.1. Output width (px)
This setting allows you to configure the output file’s dimensions. So if you want to generate high definition files, just enter the file’s width in pixels. The height is determined automatically using your defined width. If the output width is empty, the output will automatically have the canvas dimensions.
1.2. Output loop delay (milliseconds)
This is the time it will take the plugin to go through each part when generating the output files. If you get the message “The edition area is empty” during the output generation process, then it means that the value in this field is zero or not enough. You can increase this setting when the output contains HD files or when the output is HD.
By default, the generated output file will have the canvas dimensions. But this behavior can be overwritten by setting the “Output min width” in the output settings. That way, the output will have the width defined and the height will be determined proportionally to the canvas height.
When previewing, adding to cart or generating/downloading output, the plugin needs time to determine the optimal parameters based on the elements used by the customer (text, images, shapes…). Unfortunately, that time can’t be defined automatically. So you have to make sure that the Output loop delay parameter is set accordingly and that its value equals at least the output width plus 300. If during the generation, you get the error message “The edition area is empty”, make sure you increase the defined value by 500 until the issue is fixed.
To be able to send the generated data to the server, you have to make sure your server does not have limitations related to the amount of data which can be sent through a form.
1.3. PDF
Allows you to Enable/Disable the PDF output generation feature. If both PDF and SVG outputs are enabled, then the SVG will be included in the PDF file.
1.4. SVG
Allows you to Enable/Disable the SVG output generation feature. If both PDF and SVG outputs are enabled, then the SVG will be included in the PDF file.
1.5. Zip output folder
Allows you to get all the output files in a zip file.
1.6. Zip output name
Lets you name the zip output file.
1.7. CMYK conversion (Requires ImageMagick)
The CMYK color model (process color, four-color) is a subtractive color model, used in color printing, and is also used to describe the printing process itself. Allows you to set whether or not you need the output to be CMYK valid.
1.8. CMYK profile (when CMYK mode is active)
Allows you to set your own CMYK profile to be used during the output conversion. It is disabled if the imagemagick extension is not installed and active.
1.9. PDF Format
This setting gives you the ability to define the generated PDF format (A1, A2, A3, A4…..and up to 140 other standard formats).
1.10. Custom PDF dimensions
Allows you to set your custom PDF dimensions. These dimensions will only be used if the PDF format is set to custom.
1.11. PDF Orientation
This setting allows you to configure the generated PDF orientation (Landscape or Portrait).
1.12. PDF Margin Left & Right
This allows you to set the PDF margins at the “Top and Bottom” and “Left & Right”.
These settings can be overwritten from any product admin page to different output settings per product.
Last updated on May 11, 2023