Set up Members Discounts
Setting up WooCommerce discounts for members is easy when you use Conditional Discounts for WooCommerce plugin. The Conditional Discounts for WooCommerce plugin is a versatile plugin that guarantees several types of discounts is achieved in your WooCommerce online store. It is also integrated with several other plugins to extend the types of discounts you can achieve. Examples include:
- Newsletter plugins like MailChimp, SendinBlue or Newsletterplugin,
- Affiliate plugins like AffiliateWP, and
- the popular Groups plugin that lets you create membership plans with different privileges for different customers that are signed up on your online store
To set up discounts for specific members of your WooCommerce online store clientele is not hard. To implement all three examples using the Conditional Discounts for WooCommerce plugin, there are common steps
- Define your Discount
- Create your Product List(s)
- Add your Beneficiary list (Newsletter list/Affiliate list/Membership group)
- Create your Discount.
1. Define your WooCommerce Discount for Members
Decide what discount you want to provide to the members of the beneficiary group you are targeting. Is it a two week discount on ten products for Easter? Or is it a three month discount on all products in a particular category? You need to choose the discount, so that setup will breeze by faster.
2. Create your Product Lists
Product lists are lists that you use to define the WooCommerce products you are targeting, as a single set. Product lists can be found via the Menu > Discounts > Product Lists. You can populate a product list with WooCommerce products by searching dynamically or typing in the product (or variation) IDs. If you use the Dynamic option, you can search based on several factors, e.g author, categories, tags, etc. You can create product lists for those items that will be given away as free gifts, or for those items that will determine if the beneficiary deserves the discount and more.
3. Create your Beneficiary list
This is the group that is supposed to enjoy the discounts you want to set up. Depending on the type of membership discount you are setting up, you need to ensure you have the right plugin installed, activated and set up on your online store.
For Newsletter lists, install the newsletter plugin (MailChimp, SendinBlue or Newsletterplugin) and activate it. In one or two cases, the discounts may not reflect immediately with previously created lists from your newsletter provider, so creating a new list after installation is advised.
For Affiliate lists, install the AffiliateWP plugin and activate it. Complete the setup if you have not already done so.
For Groups, install the Groups plugin, and create the group with capabilities within the Groups plugin area on your WooCommerce store if you have not already done so.
4. Create your WooCommerce discount for members
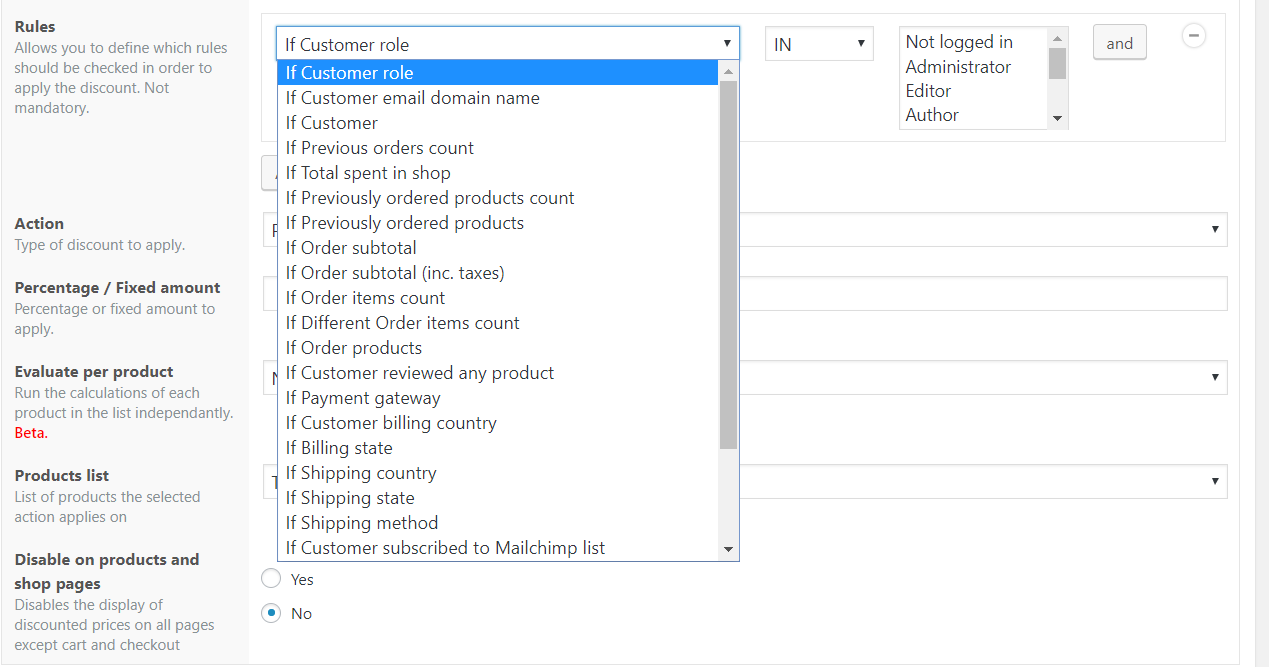
Finally, you can create your discount by going to Menu > Discounts > New Discount. The discount view lets you set up optional parameters like the start and end date (and time) for the discount, repetition parameters, e.g. repeat every 5 days, and the maximum number to limit the number of users that will benefit, to. You also set up rules, for example, in the case of membership groups, please select the rule:
If Customer belongs to the specified groups IN [your-chosen-group-name-from-step-one].
In the case of newsletters, please select the rule:
If Customer subscribed to MailChimp list IN [your-mailchimp-lists] or If Customer subscribed to SendinBlue list IN [your-sendinblue-list] or If Customer subscribed to Newsletterplugin IN [your-newsletterplugin-list]
The good news is that several rules can be added to further define your discount e.g. IF Customers previous order count is more than 10, or IF Shipping country in United States, or IF Shipping state IN Alabama etc.
There are over twenty different rules you can combine with these rules to achieve the types of discount you need to create.
Need help finishing up? We have created detailed tutorials for each of the three examples:
- Membership WooCommerce discounts for members of newsletter lists.
- WooCommerce discounts for members of an Affiliate list.
- Membership Woocommerce discounts for Group Members.
Last updated on May 11, 2023