Create a configuration
A custom product configuration is a set of parameters that can be assigned to one or more WooCommerce products that regulate how they work. Assigning a custom product configuration to a normal WooCommerce product turns it into a customizable product.
1. Make a new configuration
The first step to making our product customizable is to create a configuration. A configuration is a set of options which once defined will allow our plugin to take charge of the process of customizing your product from the designer to the generation of printable output files.
- Click on Dashboard > Kandi > Configurations, to access the list of existing configurations.
- Next, click on New Configuration to have access to the page on which you can create a new configuration.

- Add a Configuration name.

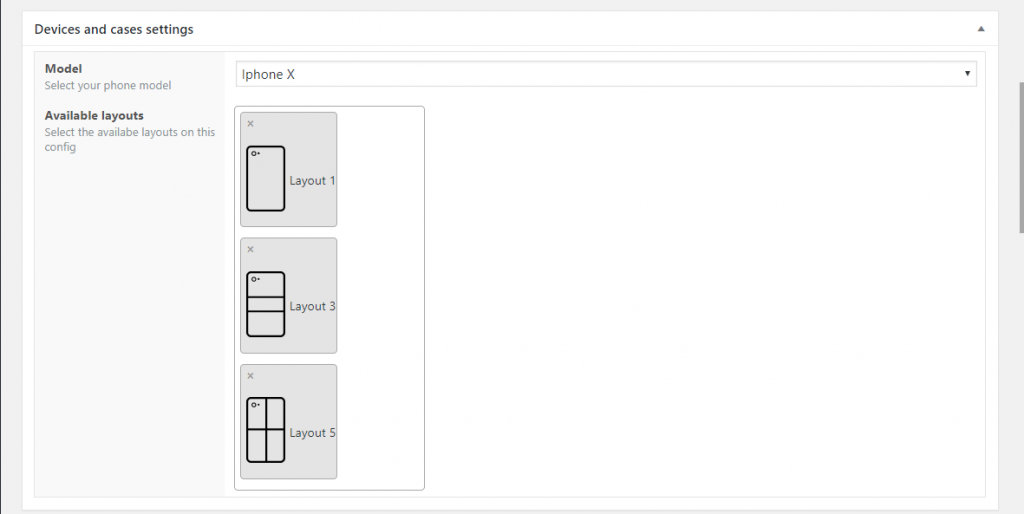
- Choose your phone model and the available layouts.

- The Text section gives you a lot of funny options that will allow you to choose how your customers should manage their texts in the designer.
- Use global fonts: This option allows you to choose if your customer will be able to use all the fonts you have defined in the fonts section or a specific set of fonts you will choose beforehand.
- Select fonts: This option allows you to choose the available fonts on this configuration.
- Max length: This option allows you to choose the maximum length of the texts your customers can add on the design.
- Colors palette type: This option allows you to choose if your customer will have a color picker or if you want to define a palette of color for them to choose the text color in the designer at the front end.

- The background settings section gives you a lot of funny options that will allow you to choose how your customers should manage their background in the designer.
- Background categories: This option will allow you to select which Clipart categories to be used as background images.

- Background categories: This option will allow you to select which Clipart categories to be used as background images.
- The output section allows you to choose the format, size, and resolution of the customer’s output file after designing it in the frontend.

- Click on the Publish button to save your configuration.
2. Assign a configuration to a WooCommerce product
Once the configuration is created, we’ll assign it to a product to make the product customizable.
- For a new product, click on Products > Add New to access the product creation screen.
- Enter your product name.

- Select the product type (only simple and variable products are supported at this time).
- For simple products:
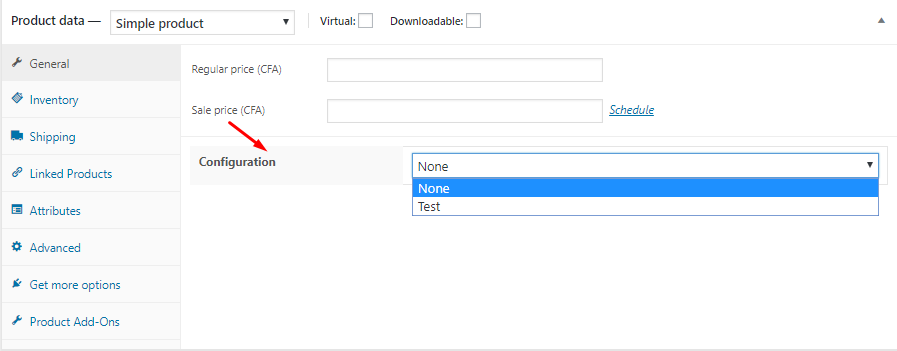
- Enter product price (note that the price is mandatory for the product to be customizable, even the value ‘zero’).
- Now select the previously created configuration.

- Publish your product.
- For variable products:
- In the product creation view, select “variable product” as product data.
- Click on the “variations” tab.
- Select the variations you want to configure.
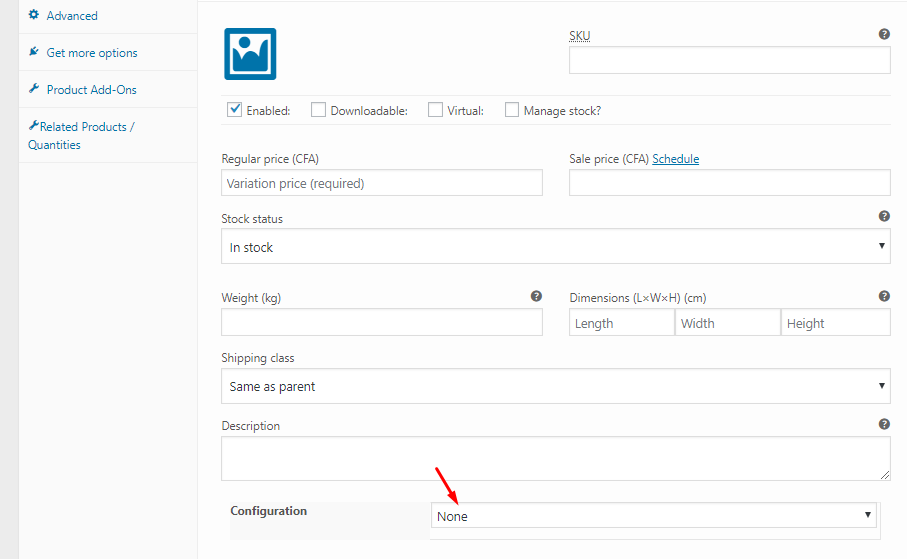
- Enter “variation price”.
- Now select the corresponding configuration previously created.

- Publish your product.
- For simple products:
3. FAQ
3.1. How can a customer customize a product?
Once a product has been set as customizable, there are 2 ways for customers to customize it:
- From the shop page (simple products only): a Design from blank button will appear under the Add to cart button. A click on it will lead the user to the editor page with the product data you previously created already loaded.
- From the product page: a Design from blank button will appear under the Add to cart button. A click on it will lead the user to the editor page with the product data already loaded. For variable products, selecting the right option will lead to the right configuration when you click the Design from blank button.
3.2. Can I add a configuration to an existing product?
Yes, but the existing WooCommerce product must either be simple or variable. The configuration field appears in existing WooCommerce products as well. You can follow the steps above for either product type, to add the configuration.
3.3. Will this work for themes that do not have any reference to WooCommerce?
This works for WooCommerce-enabled themes. It also works for themes that do not have any reference to WooCommerce. If the theme the customer is using is a WooCommerce compatible theme or a custom theme, and all hooks are properly triggered, then all buttons will appear. If not, then troubleshoot and verify that all hooks are properly triggered in the theme.
Last updated on May 11, 2023


